| |
|
| March
23, 2004 |
Time
Spent - Lost Count |
 |
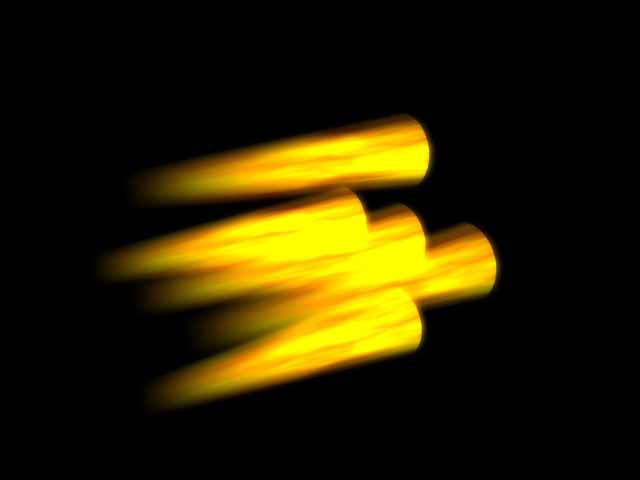
I've
been playing with the flames a bit but mostly have
been working on animating this so there hasn't been a
lot to show. I'll be working on a personal
project for the next little while but will try to do a
few more updates on this soon.
|
| |
|
| Feb
18, 2004 |
Time
Spent - 12 Hours |
 |
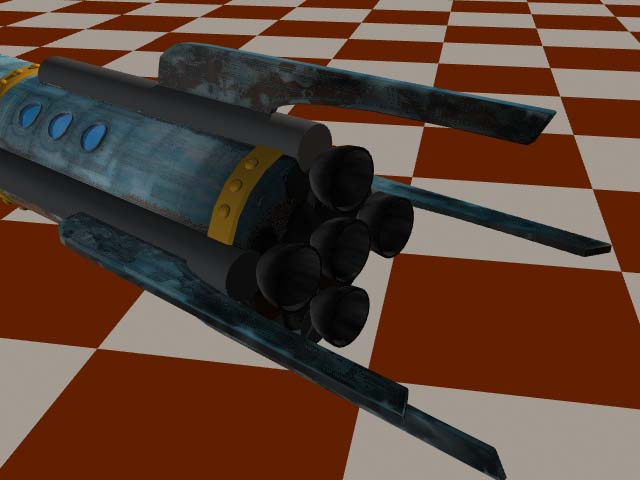
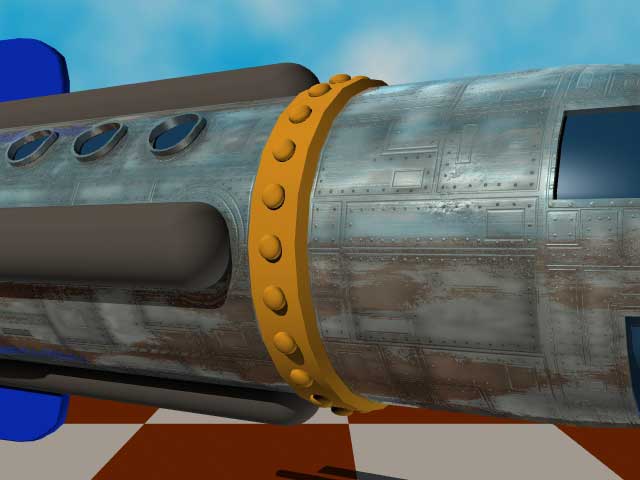
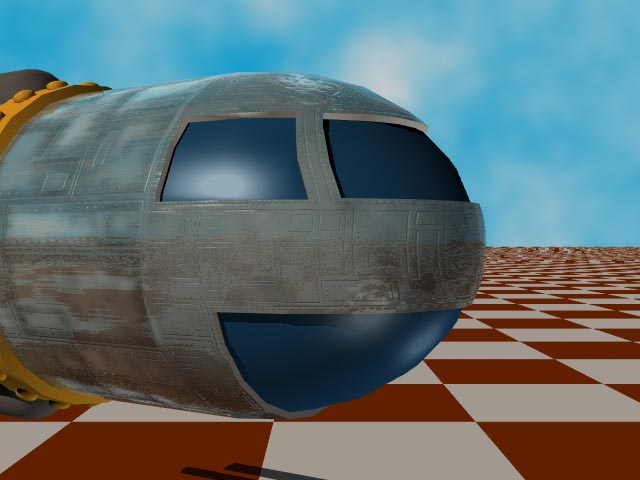
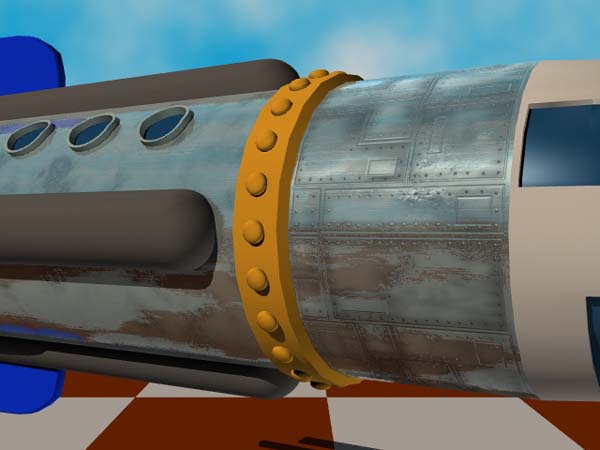
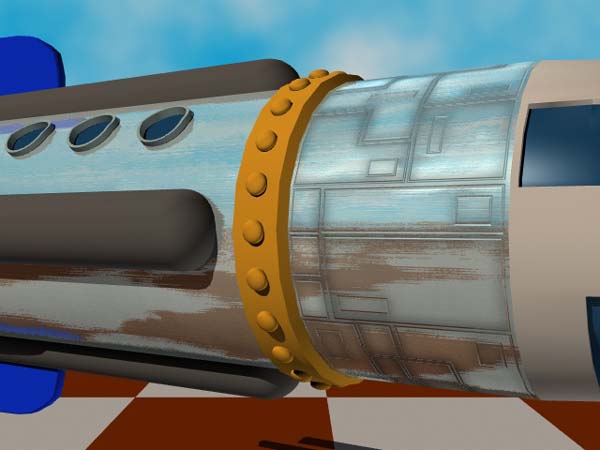
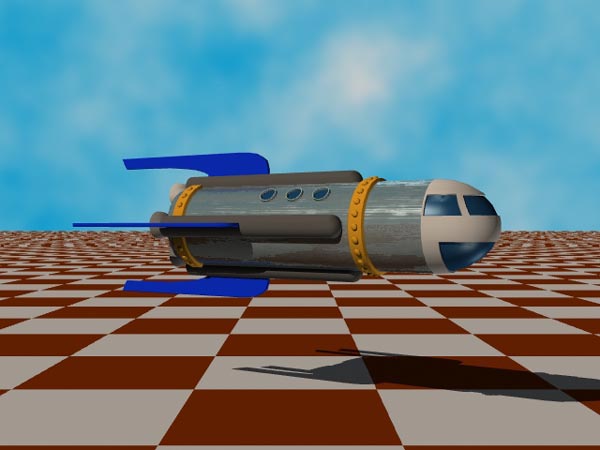
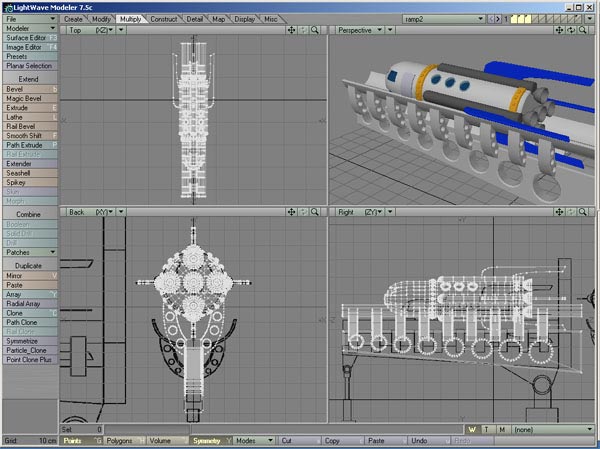
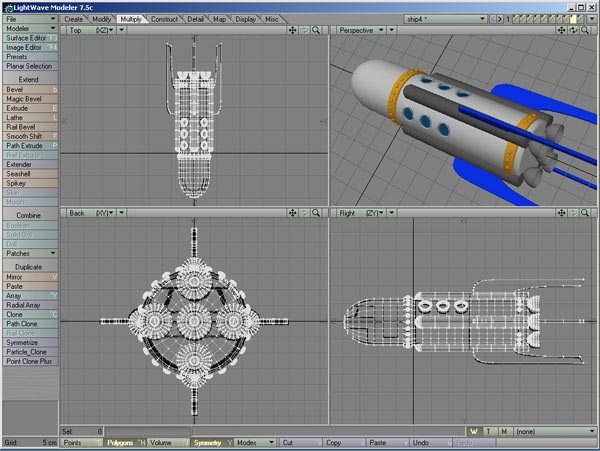
Well
I think I finally have the texturing finished on the
ship. I've started doing some of the animation
elements from the third CD and have also started to do
some texturing of the launch pad. I've also started
another blog in case you haven't noticed. I'm
working through another of Larry's packages.
This one deal with character modelling and animation
and it is on a separate page. I'm not finished
with this rocket ship yet though to keep coming back
from time to time to see how I'm doing. If you
click on the picture to the left it will take you to a
page with larger pics taken from vaious angles.
|
| |
|
| Dec
15, 2003 |
Time
Spent - 7 Hours |
 |
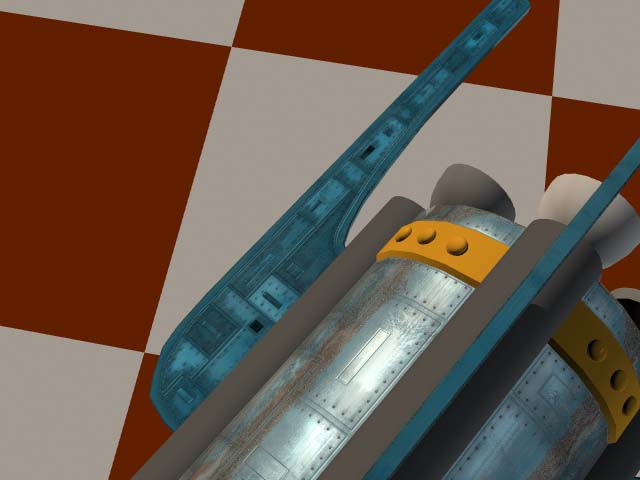
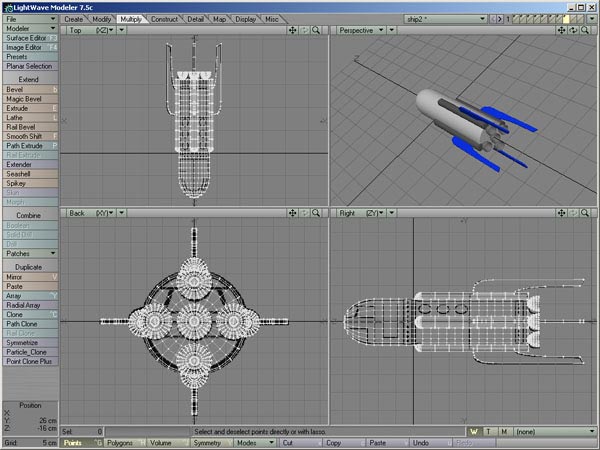
Between
work which is crazy right now, the renovation going on
in my house (which is taking all my evenings up) I
haven't had much time to work further. I spent
some time last weekend on the nozzles and here is
where I am. Don't expect any more updates until
the new year (possibly some between Christmas and New
Years). I've also darkened the fins and base of
the fusilage where I figured that the smoke and heat
from the blast of the nozzles would discolour the
surface and lower the diffuse qualities
considerabley.
|
| |
|
| Nov
24, 2003 |
Time
Spent - 4 Hours |
 |
Fin
texturing this time. I will start the back end
tomorrow along with the fuel nozzles. I had
another idea for the fins which I may try in the near
future but the playing around I did tonight didn't
translate to well. I need to step back from it
and then revisit the fins later.
|
| |
|
| Nov
21, 2003 |
Time
Spent - 6 Hours |
 |
More
surfacing. Here I've been working on the door to
the craft. Now I'm simply using the techniques
taught in the course to create the textures. I
have some ideas for the fins and fuel tanks but I need
to spend some time in photoshop flushing out my
ideas. I am getting much more comfortable with
photoshop 7 now and it is taking me less time to
create the maps.
|
| |
|
| Day
22 Nov 4, 2003 |
Time
Spent - 11 Hours |
 |
I
have been spending a lot of time in photoshop and
going over some of the videos I've already seen and
have completed the rest of the fusilage. The
thing that took all the time was two things, the
rivets ( ohmygod there are a lot of rivets!) and
getting the final images to match up with the images
from the start of the fusilage and the nose.
I'll be moving on to other aspects of the surfacing
such as the fins, the fuel tanks, etc. in the
next few days. I also think I'm getting better
at predicting how things in photoshop work as I do
this project.
|
| |
|
| Day
21 Oct 27, 2003 |
Time
Spent - 4 Hours |
 |
I've
gone back over a couple of the videos to try out
different techniques but eventually went back to the
original techniques taught by Larry. The nose is
done and matches up nicely with the fusilage.
The problem is that the rest of the fusilage is still
not done yet so I'll be doing that over the next
couple of nights. I also want to give it a
better backdrop as the red grid is starting to annoy
me. I have a plan for the background but will
need to do some more modelling work. Hopefully I
should have a good part of the texturing done by the
weekend. My time has been at a premium lately so
I haven't gotten done on this what I would like.
I will pick up the pace a bit if I can.
|
| |
|
| Day
20 Oct 21, 2003 |
Time
Spent - 5 Hours |
 |
I've
begun work on the nose cone but going is slow.
Photoshop has really sucky tools for doing any kind of
vector drawing. I've been trying to follow
Larry's tutorial and trying out different techniques
for creating panels, bump lines and rivets but
photoshop is driving me crazy (version 7.0 by the
way). I'm new to the 7.0 interface and I'm
finding myself taking extra time to figure out the
changes to the interface. Nothing drastic but it
is slowing me down. Anyways... I've been trying
to use photoshop to do vector lines and squares for
the bump map but just gave up and went back to the
method I'm used to. I then labored for a couple
of nights to create all the panels and the rivets only
to discover that the panels and rivets are too small
compared to the section I've already done. This
was really dumb as Larry stresses the fact that you
should try out "tests" as you go to make
sure that things are progressing as you would like
them too. I
could let the sie difference go but it bugs me so I'll spend the next
couple of nights fixing the proportions. I'm not
sure if you can see much from this pic but here it is
anyways.
|
| |
|
| Day
17 Oct 14, 2003 |
Time
Spent - 2 Hours |
 |
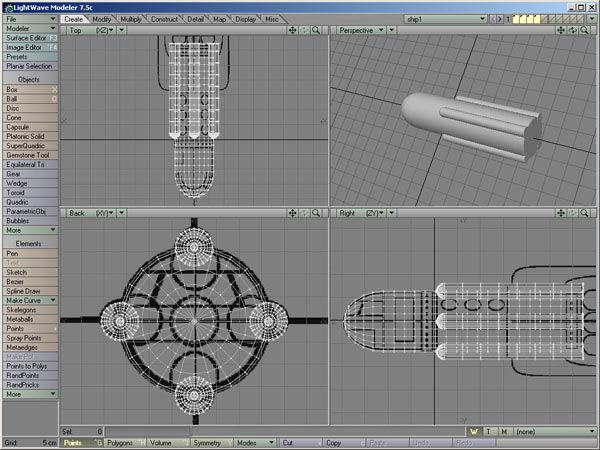
I
think I finally have a surface that I like. I've
added some rivets and changed the diffuse to dirty
things up. I've also added an overall bump to
the texture to bang up the surface in some
spots. The tutorial goes into the nose cone
texturing next so I will do that then I'll go back and
put the panels and rivets all over the rest of the
ship body. I still may turn down the reflection
but for now I'm happy with the surface. On to
the nose cone.
|
| |
|
| Day
14 - 16 Oct 6, 2003 |
Time
Spent - 6 Hours |
 |
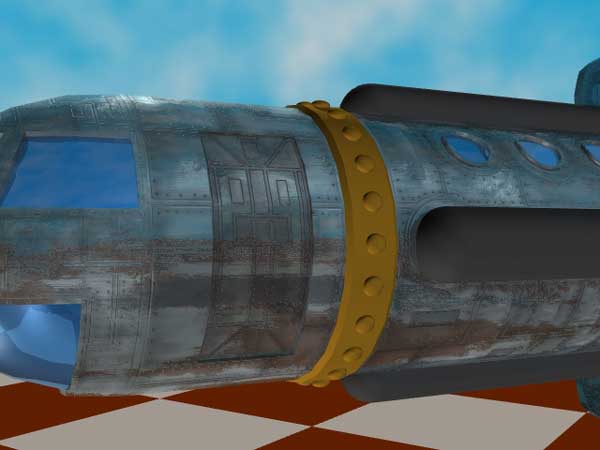
Been
busy trying various texturing techniques for adding
panels to the main fusilage surface of the ship.
Larry take you through several "tests" on a
small area where you can try different things.
I'm still playing around but here is what I have so
far. the area in question is the the area
between the nose of the ship and the gold band.
The area is highly reflective (which is something I
may change later but it's part of the tutorial so I'm
going with that) but you can see the bump of the
panels, and you can also possibly see some changes to
the specular and diffuse areas to "dirty things
up a bit". Once this texture is acceptable
then I will continue it around the entire ship.
By the way, the checkerboard floor is there just so
that we have something for the reflection channel to
reflect. That too will change in the future.
|
| |
|
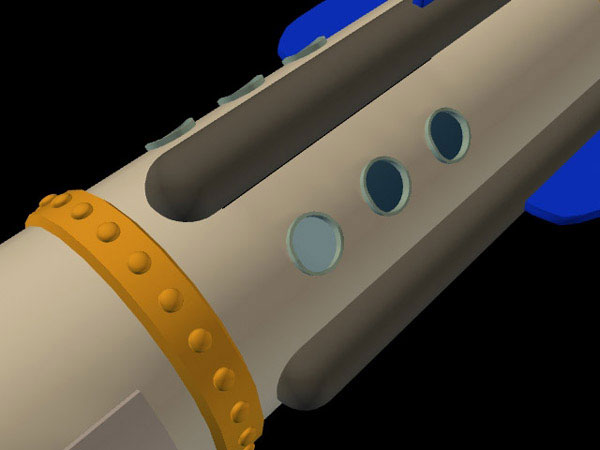
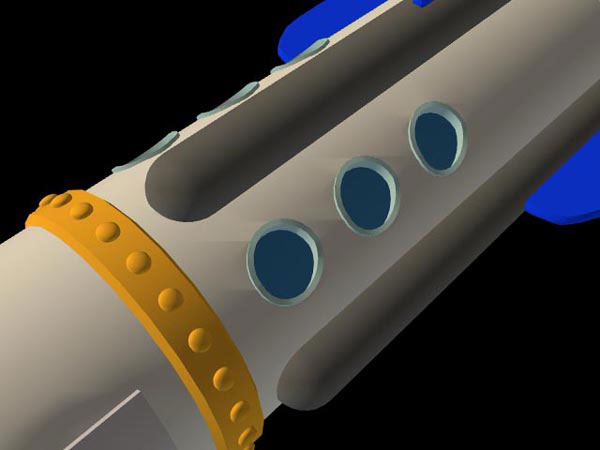
| Day
13 - Sept 29, 2003 |
Time
Spent - 4 1/2 Hours |
 |
There
a several videos that deal with a variety of texturing
concepts so I've bben going through these slowly so I
don't miss anything. There is a lot of experimenting after
watching the beginning texturing videos so take your
time and have fun. I've started the texturing on
the space ship but have just gotten into it so it looks
a bit disjointed at the moment. Things will come
together soon, and I should have more pics to show
you.
|
| |
|
| Day
12 - Sept 24, 2003 |
Time
Spent - 2 Hours |
 |
I
posted my problem to the forum that Larry provides for
the course. Larry responded quickly and he
figured out a simple method that I hadn't thought of
to fix the problem. The fix took less than ten
minutes and I discovered that I didn't need to make a
higher poly model after all. Of course I spent the rest of the
evening going over the other two models we've created
and inspected them carefully and fixed a few
problems. Mostly having to do with the same
smoothing errors. Some were easier to fix than
others. I've polished up the models and will be
ready for the beginning of the texturing sessions
next. The pic to the left shows the fix with the
portholes problem.
|
| |
|
| Day
11 - Sept 23, 2003 |
Time
Spent - 2 1/2 Hours |
| |
I
went through a few more videos which introduce a few
more concepts in texturing such as gradients so I've
been playing around with that. I loaded up the
ship to begin setting up a lighting rig and noticed
some bad pinching on the sides where the portholes
were so I spent most of the rest of the evening trying
to fix the problem. I tried a variety of
rebuilding and boolean and/or slicing techniques,
tripling and adding polys but
nothing seemed to work. So, now I'm rebuilding
the ship using the same techniques as I used to
originally build it but using more
polys. In just over an hour I'm almost finished
rebuilding the ship. I'll add the finishing
details tomorrow. The pic to the left shows the
initial problem, pinching of the mesh around the
windows. I'll post a pic of the new model next
time.
|
| |
|
| Day
10 - Sept 21, 2003 |
Time
Spent - 5 1/2 Hours |
| |
Not
really any pics to show you at this point. I've
just gone through 5 videos that explore the texturing
panel and its many options. I suggest beginners
do all the small exercises that Larry goes through and
spend time exploring what all the options are.
This is actually a very big section so experiment.
I've also gone through
1 video where Larry walks you through the Layout
interface and introduces you to the basics. The
next four videos deal with lighting basics. I'm
going to go through all these videos and do the
exercises then I'll try playing around with our rocket
ship model and lighting.
|
| |
|
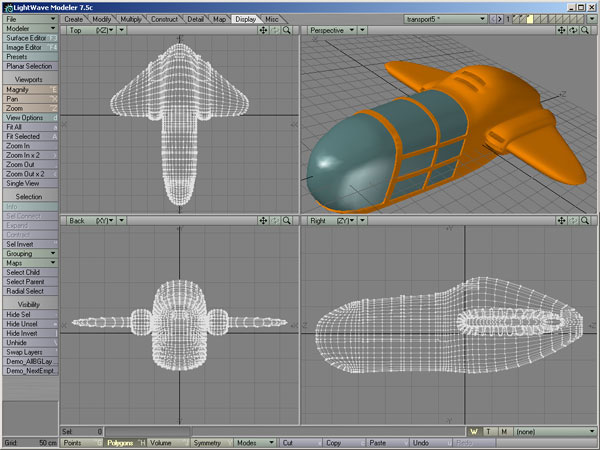
| Day
9 - Sept 17, 2003 |
Time
Spent - 2 Hours |
 |
The
last of the modelling videos gives me this. This
won't have a lot of detail as it is, according to
Larry, simply a background piece that won't be viewed
in any detail.
The next videos get
into the basics of surfacing. No images from
these yet to show you so all you get is the transport
vehicle to the left here. There should be more
by the weekend.
|
| |
|
| Day
8 - Sept 16, 2003 |
Time
Spent - 2 1/2 Hours |
 |
4
More videos and we've touched on yet more modelling
techniques. I learned a new keyboard shortcut
myself (Shift \ will bring back any hidden geometry
and hide the current visible geometry). Here you
see the work I've done on the Transport ship[ so
far. The body was created with sub division
surfaces and I've started detailing the windows into
the canopy.
|
| |
|
| Day
7 - Sept 15, 2003 |
Time
Spent - 2 Hours |
 |
After
14 modelling videos here is where I am at. There
are still 5 more videos to go so I figure the
modelling should be complete in a couple of
evenings. I was right about the changes to the
main support beam, Larry had us adjust the model so
that the holes and the supports didn't overlap.
Texturing will come later so right now there is not a
lot of colour or detail yet.
|
| |
|
| Day
6 - Sept 12, 2003 |
Time
Spent - 2 3/4 Hours |
 |
The
work has now begun on modeling the ramp for the
ship. There are a few things I would like to
change about the ramp but I'll wait to do any changes
myself in case Larry has the same ideas. (I
don't like th way that the holes of the main
horizontal support coincide with the rounded
supports. I may pull these down a bit but as I
said I'll wait to see what the video offers.
I'm not a beginner but
already I've learned a few things that I didn't know
before. For example, Larry uses the stretch tool
to made a rounded surface flat. Great little tip
and so easy too!
|
| |
|
| Day
5 - Sept 11, 2003 |
Time
Spent - 1 Hours |
 |
Two
more videos later and I've completed two versions of
the spaceship (different windows on the cockpit area).
I've put both together in one layer to show you the
different versions. Again Larry discusses
a variety of techniques and introduces more modelling
tools. The next videos will get into the
modelling of the Transport Ramp. Later we will
be doing the texturing, lighting and animating.
Personal note: I like
the video format of the tutorial. It feels like
the instructor is right there at your computer and you
can actually see what is happening. It's also
easy for the instructor to show you what happens if
something is done wrong and how to fix the problem.
|
| |
|
| Day
4 - Sept 10, 2003 |
Time
Spent - 1 1/2 Hours |
 |
Two
more videos later (that's 7 video clips for the
modelling so far) and I've added some collars with
rivets and some windows. Larry goes into several
ways to achieve similar functions. Beginners
will probably spend a lot more time on these than I
did as Larry moves fairly quickly in his
descriptions. If this is the case for you just
stop the video (I have the video running in the
background and just switch between the video and
LightWave - watch a bit of the video, pause it, try
the technique out myself in LightWave and then back to
watch more video). Larry covers a lot of
different things so beginners will want to play around
a bit so they get the handle of the tools. And
there is always the online forum to ask the author or
other students for help. |
| |
|
| Day
3 - Sept 9, 2003 |
Time
Spent - 2 Hours |
 |
Quite
a few concepts and tools are covered in the next 3
videos. The model doesn't look much further
along but Larry describes a variety of ways to model
the various new parts and discusses the pros and cons
of each way.
I can see why Larry
picked this object to model. It will use a wide
variety of techniques so the beginner LightWave artist
will get a good range of tools to learn.
|
| |
|
| Day
2 - Sept 8, 2003 |
Time
Spent - 1 1/2 Hours |
 |
This
is what I have after doing the first 2 videos.
It doesn't look like much but Larry has gone over a
lot of concepts to get to this point. How to set
up backdrop images and the importance of smoothing and
the various ways to achieve it as well as the
importance of beveling.
I would like to add
that Larry did not point out one thing which I found to
be helpful. You can save your backdrop setup to
a file by using the backdrop tab. If you shut
down LightWave all you have to do is reload this file
and all your backdrop settings are brought back
immediately without you having to re-input everything
again.
|
| |
|
| Day 1 -Sept
7, 2003 |
Time
spent Approx. 2 hours (Beginners will spend more time
but that's to be expected.) |
| |
I've
received 2 CD's. The first CD is titled Modeling
and the second is titled Texturing and Lighting.
After putting in the first CD and firing up the right
files I've discovered that this course will be
building, texturing, lighting and animating a rocket
ship. The main interface is easy to read and has
links to several free tutorials and you may want to
bookmark the support forum website as well.
I start off with a video (quicktime
files) that go through the conventions that Larry is using throughout the
learning sessions. I quickly realize that I will have to change the screen
size of my desktop. Larry suggests a minimum of 1024 x 768 resolution but
the videos are at least this size and they jump really badly for me while they
play as they are framed in the web browser. I increased the resolution to
1280 x 1024 and the videos play great now. If you you don't like having
your screen at this resolution then I suggest finding and playing the correct
video directly from the CD in the quicktime player.
There are 4 other videos. They are
videos that reinforce some basic but very important concepts that beginners
should spend some time learning. A brief overview of the modeler interface
explaining some of the basic tools, a video that explains 3D space and how it
relates to modeling, a video on how to select and deselect points and polygons,1
and finally a video on the proper way to create a content directory. If
you are a total beginner you need to see these videos first and practice the
basic concepts. Intermediate users could probably skip these videos but
they won't take long to view and are a good reinforcement of the basics.
Time for the these videos - Approx. 1 Hour (Beginners will spend
more time but that's okay. Spend the time to learn the concepts) but I
also spent an hour or so going over the main interface
and visiting some of the links and checking out the
support forum.
|
 |
|