|
The first video (27 minutes) covers the
modelling of one section of the castle walls
called the concentric wall. Nicholas (the
author) starts modelling immediately in the first
video. I would to have liked to see the
author (I am assuming it is Nicholas) introduce
himself and provide even a brief introduction to
the video series. For those who are
absolutely new to LightWave and don't know your
way around the modeller interface there are handy
little pop ups that tell you which tool and the keyboard
shortcut for that tool that Nicholas is using while he models.
Nicholas tells the viewer a few times which tool
he is using but more often than not he simply
keeps on modelling so you will have to pay
attention to the pop ups and what he is doing. A beginner can tell
visually which keyboard shortcut will call up the
next tool. I suggest using the supplied
camtasia player software to view the videos as it
allows you to easily scrub back and forth while
watching the video.
After the first two videos the pop ups no longer appear.
I assume the author did not want to annoy the viewer
with constant pop ups and assumes that the viewer
now knows how to change to these tools. At this point in the
videos the tools used are the same as those used
in the first two videos so not having the pop ups
should not be of too much concern. In the
future I would suggest to the author that he
provide more in depth commentary about the tools
he is using while he models. I received the
latest version of this tutorial and it was
mentioned that there is more on this DVD than
there was previously. People who have already purchased the DVD can
email asilefx.com to download the
extras..
In the first video
Nicholas does go over an alternate method for
creating the wall and merlons but this is the only
time he suggests alternate methods. As the
videos continue the student is taught to model
various portions of the castle. Each video
is a different section and you are given
instruction on how to model the piece and apply
basic surfacing names to various parts.
The basic premise
behind these videos is an excellent lesson in how
to create a complicated model by breaking it down
into smaller components. Build the smaller
components and then use them to construct the
finished object. The author also teaches a
valuable lesson in how to use already modelled
sections to create other pieces. In the
second video Nicholas takes the first wall and
reshapes it into another type of wall. In
other videos, sections from previous videos are
used as templates to create a new object or
reshaped to create another object. After a
while the modelling techniques become very
familiar when creating other sections of the
castle as all the pieces use the same tools
and techniques.
Up until this point the videos have
been informative and take you through the process
fairly well but there are a couple of things that you have to
be aware of in the texturing video. The
models are slightly different in the texturing video from
the models that have just been created (and the
author does point this out), the
biggest difference of which is the size so your
texturing may look different from the videos until
you scale the texture to fit your model or scale
your model to match closely the size of the models
in the video. In fact there is a read me
file on the DVD that explains how to scale an
object. I'm not sure why this is not part of
the video and may get overlooked if the student
does not read the file. Second, the author has used different surface
names on these models from the ones in the
previous videos so you may have to poke around a
bit to see which surface to use on your
model. I asked the author why there was
differences from the modelling videos and he stated that
he had a hard drive failure shortly while creating
this set of instructional videos and lost all of
the original models. He will be including
all the new models on the DVD for the student to
load up and analyze. The image maps used for the
texturing are also included on the DVD and are of
a fairly high resolution..
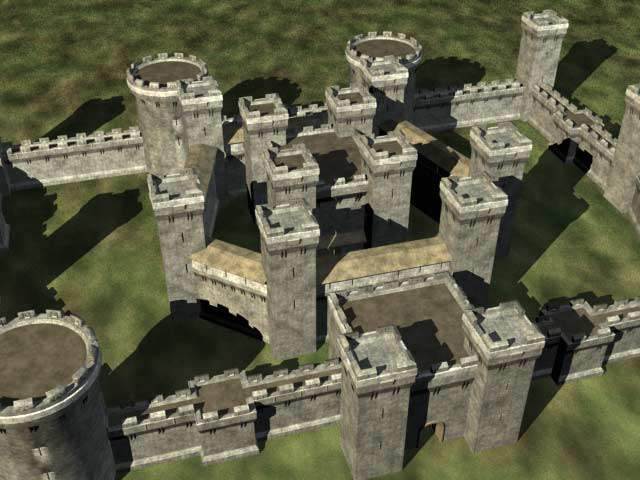
The
second last video, Build It, is how
the author creates the final castle using the
pieces modelled in the previous videos. The author has built a few new
items (notably two big round towers) but with the knowledge gained from
the first videos it should be fairly easy for the
viewer to make the new ones if he or she wants.
In this video the author takes the pieces and
constructs the castle and then in the last video
(33 seconds) he tells us that he has supplied us with
three different renders of the castle on the DVD
using radiosity. A
quick note - at times the author
can be very quiet while modelling. There was
a few times that I thought that something had gone
wrong with the video but when I turned up the
sound I could hear Nicholas clicking and typing in
the background. The author should consider
putting a bit more into the narration of the
videos rather than having these dead-air
spots. Once I discovered that these happen I
was prepared for it the next time so it wasn't
really too much of a distraction.
|